This guide will show you how to adjust your perspective view.
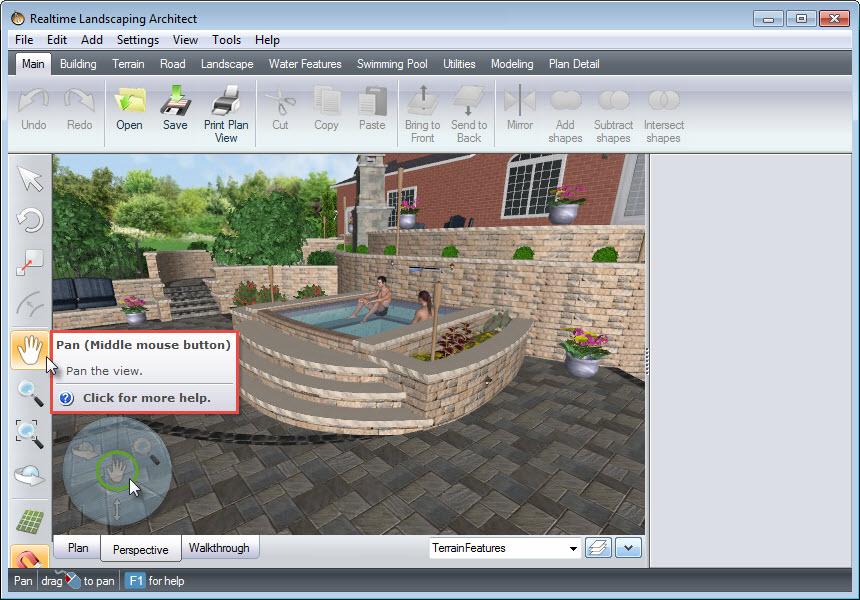
Panning will move your view forward and backward, left and right, from one portion of your landscape to another. To pan the view, press and hold the Middle mouse button, then drag the view to the desired location. The keyboard arrow keys can also be used to pan the view.
![]()
You may also pan using the Pan tool on the toolbar, as seen in the image below. You can also find the Pan tool on the navigation wheel located at the bottom left corner of your screen.
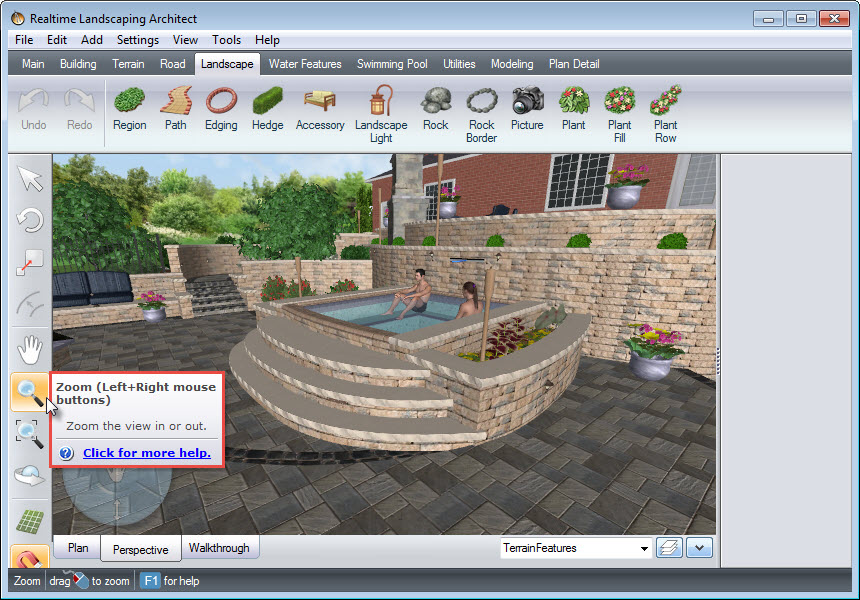
Zooming will move your view closer to, or farther away from what you are currently looking at. You can zoom the view by rotating the Middle mouse wheel, or, by clicking and holding the Left+Right mouse buttons while moving up or down. You can also zoom using the Zoom tool located on the toolbar or navigation wheel.
Tip: To reverse the zoom direction, select the Reverse mouse zoom direction option found in the Program Settings dialog, under Settings on the menu bar.
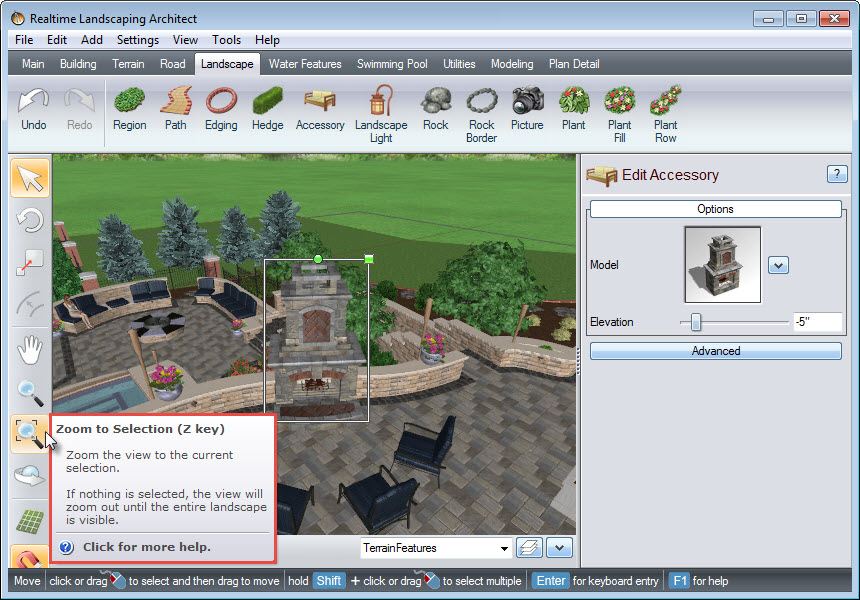
To zoom to a specific object in your design, first, select the object you wish to zoom to. Then click the Zoom to selection button on the toolbar, and it will take you to your selection. You can also zoom to your selection by clicking your desired object, and then pressing the Z key on your keyboard.
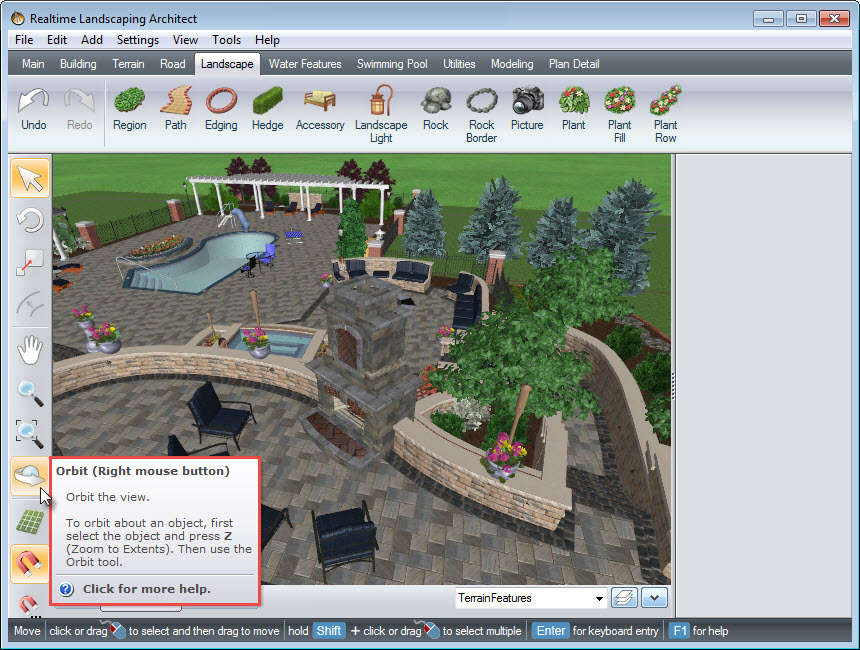
Orbiting is the method of rotating your view while in the 3D Perspective view. To orbit the view, press and hold the Right mouse button, and move the mouse in the direction you wish to rotate your view. You can also use the Orbit button located on the toolbar or the navigation wheel.
To adjust the height of your view, use the Elevation button on the navigation wheel, as seen in the image below. Simply Left click the Elevation button, hold, and drag the cursor up or down to adjust your height. You may also press and hold the + and – keys on the keyboard to adjust the height.

To see the mouse or keyboard short-cut for a tool, hover the cursor over the specific button on the toolbar.
Thank you for reading this guide, and please feel free to contact us for more information about our landscaping software.