Exporting the Viewport to a File
This command saves the contents of your current view as a JPEG or other image file. It can also be used to take a screenshot during a Realtime Walkthrough.
To export the viewport to a file:
- Adjust the view as needed so that what you want to save is displayed on your screen. For instructions, see Adjusting the View.
- From the File menu, click Export Viewport to File. Or press F5.
- Select the location for your new image and type a file name.
- Click the Save as type: drop-down menu and select a file type.
- Set the desired options and click OK.
A picture of your viewport will now be saved to the file name and location specified.
Batch Exporting Saved Viewpoints (Perspective View)
Applies to:  Plus
Plus  Pro Architect
If you have saved multiple viewpoints, you can export screenshots for all of them in one operation.
To batch export screenshots:
- Save the desired viewpoints using Saving and Restoring Viewpoints.
- Follow the steps above to choose the destination folder, file name, and image type.
- In the Export to File dialog, click Batch Export.
- In the Batch Export dialog, select one or more saved viewpoints and click OK.
One image will be created for each selected viewpoint. Each file name uses the name you entered, followed by a dash and the viewpoint name.
Notes
- Batch Export is available only for perspective screenshots, including screenshots taken during a Realtime Walkthrough. It is not used when exporting the Plan view.
- If a saved viewpoint includes the time of day and north direction, those settings will be used when creating the screenshot.
Choosing the Render Quality
For the most realistic output, enable Path Tracing. This advanced option simulates the complex behavior of light, resulting in more accurate lighting, shadows, and reflections. However, it does take longer to render.
To enable Path Tracing:
- In the Export to File dialog, check the Use path tracer option.
- Select the desired samples (Auto is recommended).
Creating a Stylized Rendering
The Render Style option can give your image a different look and feel. A variety of render styles are available; each one is explained below.
| Render Style | |
|---|---|
| Normal | No render style will be applied. |
| Colored pencil | The picture will appear as if it were drawn using colored pencils. |
| Painting | The picture will appear as if it were painted on a canvas. |
| Watercolor | The picture will appear as if it were painted using watercolors. |
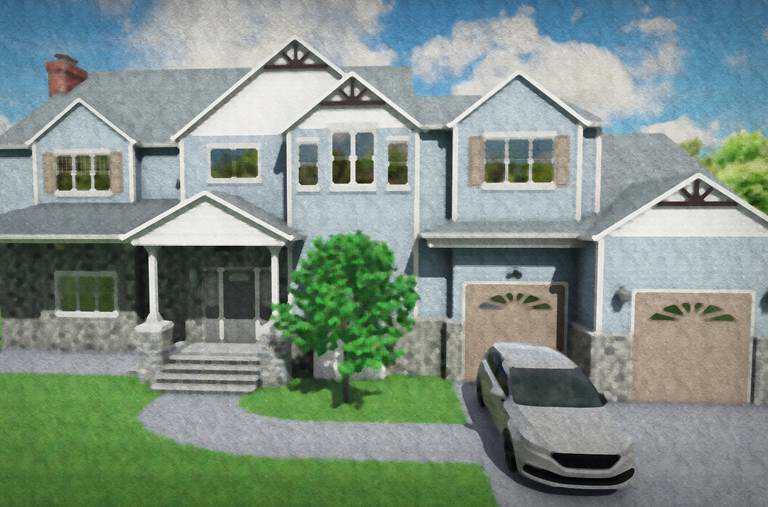
The following image is an example of the Watercolor render style:
Tips:
- The Saving and Restoring Viewpoints feature makes it much easier to reproduce screen shots from exact locations.
- The picture can be printed after it is created; see Printing a Screenshot for more information.